I want to share some close-ups of my jacket because a lot of work goes into the little details. More importantly, I want to share some links to blog posts that were very helpful with the jacket construction.

This story was not supposed to include Mr. Jay Catsby, but let me explain how he made his way into this post.
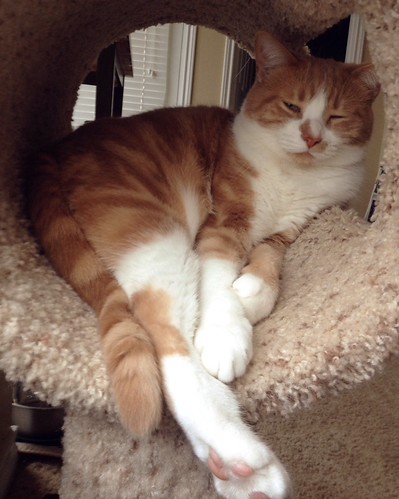
He looks sweet, no?

Well he’s devious when he’s not sleeping! After washing and pressing my jacket, I left it hanging on the door to my sewing room. I intended to photograph the insides for this post. Jay found it at night and decided to stretch his claws in the soft flannel; my hubby caught him! Ugh, never leave anything precious within his reach. Lesson learned.

Eek! See that big thread he pulled up? Ugh :( And little claw marks all over.
Thankfully, I very recently read this post by Rosy at Sewingadicta on how to fix snagged threads. It only took a moment to pull that loop to the interior, out of sight. A little pressing minimized the other claw marks and snags. Good as new.
So, back to making this jacket. I made a coat once before, when I was a naive beginner. I used a BurdaStyle pdf pattern, and without detailed instructions, I put together a floppy jacket that was a little too big. I finished it just before starting this blog, so now I’ve got almost two more years of experience and blog reading behind me. Now I know better. Jackets need some interior structure to shape and mold the fabric into a proper jacket.
I’ve followed several bloggers through their coat escapades, learning as I followed along. And most of those adventurous gals used pad stitching. I knew I didn’t want to do all that interior hand stitching, and the thin flannel fabric I selected was not a good candidate for pad stitching anyway (just look at my hand stitched hem–little marks all along the bottom). I knew I wanted to use fusible interfacing for structure, but I didn’t know what kind of interfacing to use, or where to put it. Also, what are sleeve heads/wadding, and how do those go in?
A little research helped me find my way. I’m no expert, so rather than explaining every step, let me share the posts that I followed.
Sherry at “Pattern ~ Scissors ~ Cloth” did a sew along with tons of helpful information. Here you can find the links to all her posts for the “Ready-to-Wear Tailoring Sew Along.” I read through the whole process, but my pattern already included many of the alterations she made, so I skipped ahead to the interfacing process.
This post discussed interfacing as well as shoulder pads and sleeve head wadding. I found a cotton interfacing at my local Hancock’s that worked well enough, and I used a little bit of fusible horse hair canvas that I already had on hand as well. I decided to make my own shoulder pads and wadding, using cotton batting and interfacing. The shoulder pads worked fine, but in the future I would order sleeve heads… My hack job is a little bumpy along the sleeve head.

The above photo shows where I added interfacing. The black stabilizer is a light to mid-weight fusible cotton, and the horse hair canvas is on the lapels (layered), creating the roll line and making crisp lapels. I cut the horse hair canvas without seam allowance because I used it on a shirt in the past and found it difficult to turn and press. If you really know how to work your iron, maybe you could tame that canvas, but I found it easier to keep it out of the seams.

I also layered the under collar with some horse hair canvas for greater support and shaping. I didn’t quite know where the roll line on the collar would be, so that’s why I left some open spaces. It worked out, but in the future I would more precisely measure and mark the roll line. Here Sherry talks about where to add fusing, but I would recommend reading through all her posts because she covers fusing in several of them.
I followed the Coletterie tutorial on bound buttonholes and was pleased with the results. I didn’t expect to like bound buttonholes so much, but they really do add a professional touch to a jacket. Plus they make buttoning my jacket a breeze!

This is the interior view of the buttonholes where I hand sewed the facing down.
This project was also the first time I worked with stripes/plaid where I actually cared that the lines matched up. Sunni wrote a fantastic post on where to match and where to let go of matching at A Fashionable Stitch. It took some effort, but I’m pleased with the horizontal match ups I made!


The collar was the one vertical match up I went for, and you can see it’s quite off. The stripe at the back was off-center, and I think I over compensated the wrong direction on the collar. Whoops! :)
The lining is a quilting cotton that I had in my stash for a project that I never got around too. I only had a yard, so the sleeves were cut out of a cotton batiste I also had on hand.

Here’s a close up of the narwhales; they have rosy cheeks!


Ok, enough pictures. But let me share a few more links that helped me on my way.
Here Sherry goes over the sleeve head insertion. I didn’t take photos–my sleeves aren’t the best, so look at Sherry’s!
Also, check out Tasha’s jacket here at “By Gum, By Golly–“those are some beautiful sleeves. Her’s is one of the jackets that inspired me and provided a wealth of information on construction. One of my favorite posts Tasha has written was on patch pockets; the same technique applies to collars and lapels. Sherry covers altering the collar and lapel pattern pieces to cause the seam line to roll under in the same manner Tasha covers. The beautiful thing about vintage patterns (at least the one I used) is that it already included these details in the pattern pieces. In the past when notches and edges didn’t match up perfectly, I assumed it was a mistake. Now I know that a little bit of easing is in order to make the notches match–it’s part of the intentional design and creates nice curves in the garment.
I think this is a record for the longest post I’ve ever written! Hope you don’t mind. I want to have notes to refer to, for my own use, and this is my way of sharing a little of the knowledge I’ve gained from so many other wonderful bloggers. I hope it is a useful resource to someone else.

Wow, nice work. :)
Great job!
Gorj! Also, that lining is the cutest, twee-est thing EVAR! Love it!
Qui it looks awesome!! I’ve been dying to make a blazer but adding all the interfacing and stabilizers always seems a bit daunting to me. Thanks for including the links that helped you out. p.s. I LOVE the narwhal lining. Too cute.
This is the perfect reference post for anyone interested in sewing a coat. You put so much thought into making it and it really paid off! xo
My first visit to your site, through Colette. I’ve been sewing since the age of 8, almost 50 years. Your 1940’s jacket is exquisite! I so appreciate that you took the time to research and learn how to do everything the right way. Your attention to detail really shows, and I love the lining! Great job!
Bonnie, thank you for the sweet comment for reading my post!
Love this work in progress! This jacket is gorgeous and has a lot of sewing work and research behind it … that makes it even more valuable. Thank you for your reference to my tip for the wires hooked. You are great!! I think we are all looking forward to see more pictures of the jacket. A thousand kisses.
awe, Rosy, your post on the hooked thread could not have come at a better time! It saved my jacket–thank you :)