New Jeans: Birkin Flares

With cold weather creeping in, I knew I needed to make some new jeans ASAP.  Just my luck, Lauren of Baste and Gather was looking for testers to sew up her Birkin Flares jeans pattern.  They looked awesome on her, and I  could really use the “dead line” pressure to get some sewing done for myself, so I applied and was selected.  Yay :)
DSC_0002

DSC_0003 DSC_0007

DSC_0013 DSC_0035
DSC_0031

DSC_0024

These jeans have a moderately high rise with a close fit through the hip and thigh that flares out at the bottom.  The fit and instructions are great, so be on the look out for this pattern.  It’s going through a second round of testing and will hopefully be released in a couple weeks.

As soon as time allows, I definitely want to make a couple more pairs!

Ikat Hearts and Bluebonnet Fields

Last spring I was told how beautiful Texas was in springtime and that flowers would be blooming all over.  I saw a few, but I wasn’t really all that impressed.  Well, this year, the bluebonnets and other wild flowers are truly in full bloom.  Whether I’m just getting out and about more, or the flowers are putting on a better show this year, I don’t know, but I set out to photograph my new dress in a field of bluebonnets.  It seemed like the Texan thing to do.

IMG_0655
After scouting a location, driving there and dragging along my husband to play photographer, you can imagine my great disappointment when the camera battery died just as I finished snapping a few test photos.  It has an amazing battery that lasts forever, and as a result I hardly ever charge it.  Whoops.  Didn’t even think about it, but it’s surely been quite some time since it was charged.  So much for capturing the flowers in great detail; iPhone to the rescue.
IMG_0652


This dress is Simplicity 2147.  I had two yards of this cotton ikat fabric (only 45″ wide), and I searched high and low for a dress pattern that would work with it.  To help conserve fabric, I paired it with a chambray (cotton/linen, I think) for the yoke.

a08c2fa0b6e2f7aeea359e748061dbc1


I cut out a size 16 and then recut the yoke in a 14 when I confirmed that the shoulders were too wide for me.  I also pinched out a half inch at the center back neck line on the yoke to get a better fit.  It lies flat now, and the fit is comfortable.  The dress is gathered into the yoke instead of pleated, and I also added some width to the lower portion of the dress, so it’s a bit more roomy and swingy than the original pattern design.

IMG_0654
My husband confirmed my suspicions that this dress is a total “moo-moo” style, and I’m gonna be wearing it belted until it gets so hot that I no longer care what I look like.
IMG_0653
The ikat fabric looks like sketchy little hearts.  It is light and flowy; the weave is a little on the loose side, feeling almost like linen.  I was determined it would be a summer dress, and I’m pleased with the outcome.  The pattern is an easy make with no closures and a loose fit.  I did line the yoke to get a clean finish; the pattern directions use bias tape to finish the armholes and neckline, and the bottom edge of the yoke is overlocked.  I don’t think lining the yoke took any more effort, and to me it looks and feels so much better.  Oh!  Almost forgot, I also added at least 4″ in length.  The dress is called a “mini,” and I think the original hem length would have been mid-thigh on me; not my style.

Well, these aren’t quite the photos I imagined, but at least I managed a blog post!  Here are a couple more of the “family” for your enjoyment.
IMG_0651

IMG_0647

Silk Blouse With Dogs

When I participated in the Cat Lady Sewing Challenge, I knew I needed a dog sewing challenge too!  I was so excited when Tanya announced just that.  Finally, the perfect excuse and deadline to use my silk dog fabric that I bought at Mood Fabrics LA over two years ago.  I was putting off using it until I had improved my shirt sewing skills and had the right pattern for it.  Well, I’ve made probably a dozen button up shirts by now, and although I did not have the perfect pattern, I hunted one down for the occasion.

I searched high and low, looking at every kind of top and blouse pattern.  I checked all the big pattern companies, every indie pattern company I could find, and I scoured Etsy for vintage patterns.  And of course I fell in love with a vintage pattern that wasn’t available in my size:
il_fullxfull.608098793_tova

Simplicity 4610–a darling blouse perfect for my light weight silk.  Bust size 30.  And I’m a 38.  So I finally decided to suck it up, buy the pattern, and grade up approximately 4 sizes.  The design was simple enough, grading it couldn’t be too hard.

And as it turns out, grading really wasn’t all that bad.  I did it.  I drew the pattern with some alterations on Wednesday, finished a muslin on Thursday, and cut into the silk Friday.
image

My fabric has a dog pattern woven into it, and the doggies are neatly lined up, so I eliminated the center front and back seams to keep from breaking up the pattern.  I knew I wouldn’t be wearing the blouse tucked in, so I also left out the front and back darts at the waist.  Loose and comfy through the waist is my ideal.
image

Between the yoke and pleats, I had plenty of work to do despite the simplifications I made.
image

The fabric features dachshunds, which I don’t have, but I did name my Australian Cattle Dog “Lucy” after my grandparents’ dachshund.  My aunt is an “I Love Lucy” fan, and she named my grandparents’ dachshund after Lucille Ball.  As children, my siblings and I fought over who’s sleeping bag Lucy would sleep in when we visited my grandparents.  So, when I picked out my little redhead in early 2007, my sister and I spent hours running through possible names until we landed on “Lucy.”  In fond memory of Lucy the dachshund and in the spirit of Lucille Ball, the name seemed to fit the little spitfire.

leopard

IMG_4497


She’s over 8 now, and 2015 started out rough for her with some medical issues.

IMG_5007

IMG_5134


But all that’s behind us now.

IMG_5362
IMG_5431


Now that we’ve done the cat and dog sewing challenges, who’s hosting the horse themed challenge? :)

Sweet Shirtdress

I believe it’s been at least a couple months since I’ve sewn any garments for myself, and I’m so glad I took a break to make myself a shirtdress.  Thanks to Idle Fancy’s sewing challenge, I made McCall’s 6696, and I love it.
DSC_0002

I honestly haven’t sewn very many Big Four sewing patterns; looking back, it seems I’ve stuck to independent pattern companies and vintage patterns.  And also BurdaStyle.  I really loved those instant download pdfs from Burda when I was first getting back into sewing.  Anyway, I am quite pleased with this McCall’s pattern.   This is the first pattern I’ve used where you can select your cup size and the corresponding bodice pattern piece.  It worked out quite well for me.

DSC_0009


I did make two adjustments right out of the gate: I shortened the bodice 1″ and cut off the sleeve cap ease.  I don’t like easing sleeves in, and why should I?  I contemplated raising the armscye as well but decided to try it out as is first.

DSC_0012


I feel the fit is quite good.  The dress is comfortable and I can move freely.  I will probably raise the armscye for future versions, but I’m pleased I can indeed move well enough as the dress is now.

DSC_0020


I’m a little wrinkled in these photos because I was out running errands, and as you can see, I’m wearing slippers.  It turns out I don’t have much selection in winter footwear.  I’m a jeans and boots kind of gal in winter, and I have flats in red and maroon because those colors go great with blue jeans too.

DSC_0025

So now I’m curious, what do you all wear on your feet with a dress in winter?  I need some suggestions, stat!

DSC_0026

Chris was a dear and took my photos so that I didn’t have to mess with the tripod today.  And that meant my hands were free to bring Lucy and one of my clutches.

DSC_0032


I was excited to see, after finishing this navy blue clutch, that it matched with this plaid fabric.  And that is truly why I finished this dress when I did–something to go with my new favorite purse.  For those who may not know, I’ve been sewing leather of late, and that’s why I haven’t been sewing clothes.   You can check out some of my other purses in my etsy shop.

DSC_0047

I hope to blog a little more about sewing leather and purses in the next couple months, so if that interests you at all, keep an eye out, or better yet, let me know in the comments.

Undercover Cat Lady

Don’t tell my dog, but I’m a total cat lady.  It’s not really a secret or anything, but the dog did come first, and she’s the jealous type.  For what it’s worth, I’m an absolute dog lover too!  (We don’t have to choose between our loves, right?)

Thanks to Erin’s Cat Lady Sewing Challenge, I’m finally throwing up a blog post, and I’m even including three hand-made items.  In honor of our cats and all the hours they permit us to spend at our sewing machines, here are my cat themed garments:
DSC_0015

Meow!

Maybe you can’t tell, but there is definitely some cat hair on both these garments.

It wasn’t my intention to hide my cat fabric, but that’s what ended up happening.  The jeans were next on my sewing list, and after a blouse that turned into a wadder, I swore to never use quilting cotton for garments again (I didn’t really mean it) and lined my jeans with the last of my cat fabric.
DSC_0007

While I really wanted to let my cat freak-flag fly and use this fabric on the outside of a garment, it just didn’t pan out.  The blouse I made was looking like pajamas and I knew I’d never wear it.   I decided to be practical and incorporate the fabric into my jeans instead.  I love the results.  Every time I go to the bathroom, I admire this charming fabric.
DSC_0009

I copied a pair of jeans that fit me well to make this pattern about a year ago.  I brought the rise up a little higher and widened the waist band too.

DSC_0010

There are double lines of top stitching all over the place, but the navy blue thread conceals those little details.  I don’t have anything against gold thread for top stitching, but I do think it adds to the casual look of jeans.  So I guess that makes these my fancy pants. I’ll get around to stitching some up with gold thread, maybe when I try out the new Ginger jeans pattern.

DSC_0022

DSC_0020

There are a few wrinkles in the back, but as the denim relaxes, they become less noticeable.  The denim is 2% stretch, and that little bit of stretch goes a long way in forgiving fitting errors.
DSC_0003

The shirt is an older make, but it seemed the most appropriate top to wear for this blog post.

I used the Archer shirt pattern and left off the cuffs.  The leopard print fabric is featured on the under collar and inside collar stand, as well as the inside of the yoke.  This was my attempt to make a black work shirt a little more fun.

DSC_0004

I promised a third make, so here’s a little glimpse of what I’ve been spending most of my time on lately:
DSC_0034

I’ve been dying and sewing up leather.   This piece is a croc print clutch.  You can see more photos in my Etsy shop if you are interested.

I look forward to the day I stumble across a light weight cat print fabric.  In the meantime, maybe someone wants to host a dog themed sewing challenge?  I have a black silk fabric with dogs woven into it that needs to be made into something useful.  :)


Leather Tote Bag

So my sister came to visit me a week ago, and we did some sewing–she a circle skirt and I a leather tote.  I have to say she came away the winner since both items went home with her, but I’d do it all again for a few more days together.
DSC_0011


Her skirt is sewn from a heavy canvas type of material with a directional print.  In order to keep the print more or less upright, she cut four pieces to form the circle.  This strategy worked out quite well, and with all the fabric and print gathering around, the seams  are hard to spot.

While she utilized my Janome, I was busy on the Consew with leather.


DSC_0020


This is the first leather bag I’ve completed!  I’ve been working on my bag making skills, brushing up on some leather techniques, and generally working towards this moment for months now. There’s nothing like tackling a big project to gauge what I’ve learned and what I have yet to learn.


DSC_0026


The exterior is cut from a veg-tanned cow hide that I dyed with Eco-Flo water based dye in the color Dark Mahogany.  The interior is an upholstery weight fabric that Jessi picked out at Hancock Fabrics, and the pockets are lined in red cotton.

DSC_0035


Working with leather does require some special tools (besides the upholstery weight industrial sewing machine).  I wanted to add metal rivets for strength and visual appeal, and  I had to get the appropriate hole punch, mallet and rivet setter.  As I plan to use them extensively in the future, the extra tools were a worthy investment.  I was very impressed with how sturdy the handles felt after adding the rivets compared to when they were only stitched on.

DSC_0042


As far as construction, sewing this bag up wasn’t so much different from a cloth bag until I tried to turn it right side out.  The leather is quite stiff (I’d guess the hide is 4-5oz) and the seam allowances can’t be pressed open.  I literally wrestled with the bag, pushing and pulling for 10-15 minutes just to turn it.  Once it was turned, Jessi and I took turns pushing out the bottom of the bag and working on the seams.  It was at this point that I became tired and frustrated.  There has got to be a better way to do this with leather!  I’ll be experimenting with thinner/softer leathers, smaller seam allowances (I used 1/4 inch S.A.), a beveler and other designs to improve the experience and results.

DSC_0047


Another detail that differs from working with cloth is how one finishes the edges of leather.  The handle edges as well as the top of the bag are all cut edges that require some sort of finishing to improve the look and durability of the leather.  I used bee’s wax and a slicker to finish them on this bag.  I like the way this method looks, but it takes a fair amount of time and effort.  The other method I’m aware of is to use Edge Kote, which is simply painted on.  This method sounds easier, but in my experience, it cracks over time (ever had a purse with a handle where the edges are cracked all over?)

All in all, this bag was a lot of fun to make and I’m pleased as punch with the results.  I’m already working on #2 and planning #3.  Have you worked with leather?  Any resources you could recommend for learning leather techniques?

Quilt for a Babe

Hiya, just a quick post today to show you what I’ve been up to this past week.

I am sending out a baby bedding set to a friend in CA.  I wanted to try my hand at making bumpers, a fitted sheet and a crib size quilt.  It was all quite easy, if not a little time consuming.  I used Nu-foam pre-cut bumper pads which came with instructions for making the covers; essentially you make six pillows with ties.  And I used a tutorial found on Pinterest for making the fitted sheet.  The sheet tutorial used french seams in the corners which I thought was a nice touch.

And the quilt:
DSC_0015


If the quilt were any bigger, I’d keep it for myself.  I fell in love with all the fabrics and stitches that went into it.

I watched the first several episodes of “Orange is the New Black” while quilting–I’m totally hooked.
DSC_0007

DSC_0006

DSC_0005

DSC_0012


This size quilt (about 37×48) was really fun to make and much easier to quilt than a full-size one.  If you haven’t quilted before and want to try, I’d recommend starting with a baby quilt.

Floral Flora Maxi Dress

With summer heat comes mosquitoes.  I was brutally attacked by swarms of the little bloodsuckers while watching my husband play softball Monday night.  Even covered head to toe with bug repellant, they were still biting.  With big red welts all over my legs, I knew it was time to sew up a new maxi dress for summer.

DSC_0008

Maxi dresses: light and breezy while still covering your legs, which means of course, I can cover up unsightly bug bites and stubble.

This dress uses the Flora (By Hand London) dress pattern for the bodice, and about 80″ of gathered fabric for the skirt.
DSC_0011

The floral fabric is rayon challis from Hancock Fabrics, and the bodice is lined with batiste.  The rayon is splendidly drapey and light, and the batiste adds just enough stability and coverage in the bodice.
DSC_0022

The neckline was a pain to fit; I intentionally made a couple tucks where the front pieces overlap into the waist seam.  I thought I had it all worked out and was quite pleased until I sat down in my finished dress.  My shoulders dropped forward and I looked down only to see my entire chest hanging out.  I tacked the overlapping pieces together at the center front to make the dress wearable, but it does not lay flat at all.  Unfortunately, this is not a bodice pattern I will use again.  Regardless of the gaping neckline, I intend to wear this dress all the time.
DSC_0018


My love for rayon has been renewed.  I’ve already got a skirt put together with this same print in another color scheme, and I’ve got two more geometric prints in my stash ready to be made into another skirt and dress.  I am machine washing and hang drying my rayon makes in order to prolong their life.  How do you care for your rayon garments?

A Coat in Central Park

I’ve recovered from a trip to NYC celebrating my 30th birthday, and I’ve got a few photos to share.  I was warned it would be cold there, but no amount of warnings prepared me for just how truly cold it was.  It’s not exactly that it was so much colder in NYC than anywhere else I’ve been, but the amount of walking outside we did was exponentially more than the norm for me.  I was never all that bothered by the cold in Texas this winter when I’d hop from one warm building to the next.  But it only took a minute for my hand to become icy cold in NYC when I was standing on a sidewalk trying to use my iPhone  to navigate the direction to the next tourist attraction.  We quickly learned the value of layering clothes, I bought fleece lined tights at the local Duane Reede, and we took turns taking gloves off to use our phones.
DSC_0040

I had four wonderful traveling companions…and I didn’t manage a photo of all of us.  So here are 3 of the 4 beauties I spent most of my time with.  My twin sister is on the left, little sister in the middle, and my Spanish friend Ruth on the right.  Ruth’s sister also joined us.

I won’t recount all the details for you, but we had a lovely time in the city.  I do intend to tell you all about the coat I made for my trip and the sewing blogger I met.

As for the coat, it’s a vintage Vogue Paris Original, # 2575.  I was drawn to the shape of the collar and the yoke details.  It lacks pockets, but after much searching for the perfect pattern, this was as close as I could get to a shape that I liked.  The side belting made adding pockets inconvenient, so I planned to wear gloves and not worry about pockets.

DSC_0003

The pattern was interesting to work with because there are no side seams and there were 1.5″ seam allowances at several points.  I couldn’t disregard the instructions since the shape and construction were quite different than any other jacket or shirt I’ve made before.  So I completed all the written instructions, one step at a time.  The shoulders are intentionally dropped, and there are no shoulder pads or sleeve heads.  The yoke is stabilized with horse hair canvas, and all pieces are underlined with weft interfacing which added subtle stability and a nice layer to anchor hand stitching. This was my first time using weft interfacing; it’s kind of like cheesecloth–loosely woven, and it definitely requires the use of a pressing cloth.  I cleaned my iron twice and used multiple cloths while working with this stuff–it was icky and awesome at the same time!
DSC_0004

The lining is a nasty poly fabric with an adorable Russian nesting doll print.  This fabric was awful to work with, but it’s nice and slippery as a lining.  I underlined the lining with a thick flannel for warmth (there by “interlining” the coat).  The flannel helped stabilize the poly lining and made it tolerable to work with.  Even with the interlining, I’m not sure this coat is exactly winter weight.  The outer fabric is an unknown wool that was given to me.  I think it’s on the lighter side for wool though and maybe not the stuff winter dreams are made of.  But hey, it was free, and it pressed and sewed beautifully.  Plus I just layered a sweater or other long sleeves underneath–isn’t that the point of a loose fitting coat, being able to wear layers under it?!

DSC_0223

The sleeves are a tad long, but I’d prefer a long sleeve to a short one any day.  And that kind of sloppy fitting is bound to happen when you skip the muslin fitting, right?  I can live with it.

DSC_0183

DSC_0206

I doubled up on thread for the topstitching, not that you can tell.  I couldn’t find a topstitching thread in the right color, and after trying a couple different darker shades of brown, I decided the stitching looked best in a matching shade.
DSC_0176

DSC_0179

DSC_0007DSC_0005

I used brown buttons from my vintage stash (same source as the wool) for the front closing and the cuffs.  I couldn’t help but wonder if the lady who bought the wool picked these buttons to go with it, or if she had other plans.  The only problem with vintage buttons is that I didn’t have enough… So I used some from my local fabric store for the belting.  The fact that they don’t match doesn’t really bother me.  11 buttons is kind of a lot, and I don’t care to spend another $20+ for matching buttons.

DSC_0152

Central Park was a great place for taking photos.  It’s beautiful even in winter.  But I’d sure love to see it all green too!
Untitled

The final highlight of my trip that I’d like to share with you was meeting one of my sewing heroes, the blogger behind Ginger Makes.  Sonja is one of my favorite bloggers, and I regularly buy patterns based on her recommendations because she sews garments that are practical and spectacular.  She was kind enough to meet up with me and show me around Mood Fabrics too.  Thank you Sonja!!  I did buy two lovely fabrics at Mood, and I hope to share those as finished projects with you sometime this year.

2 Archers + Black Shirts

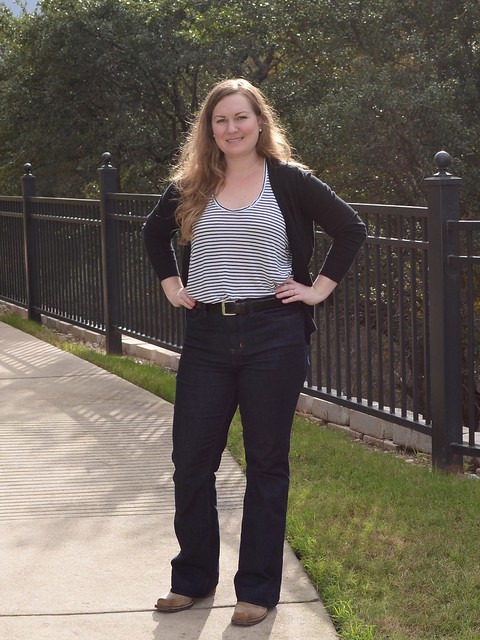
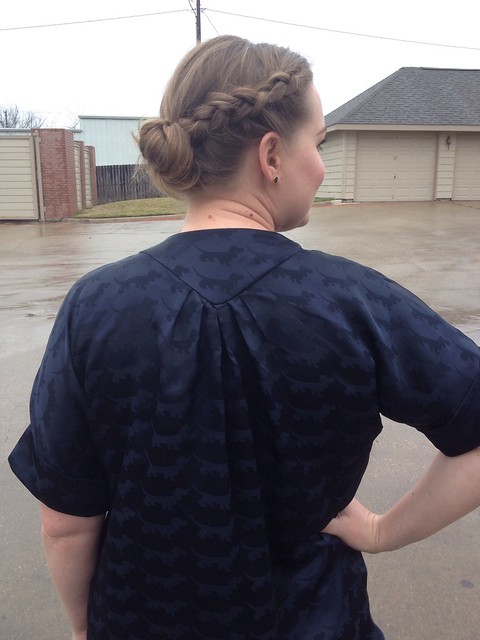
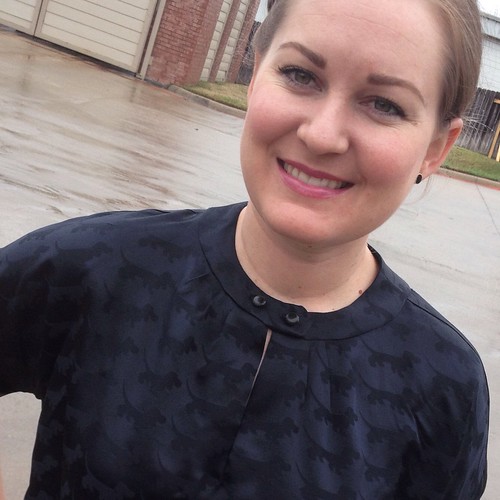
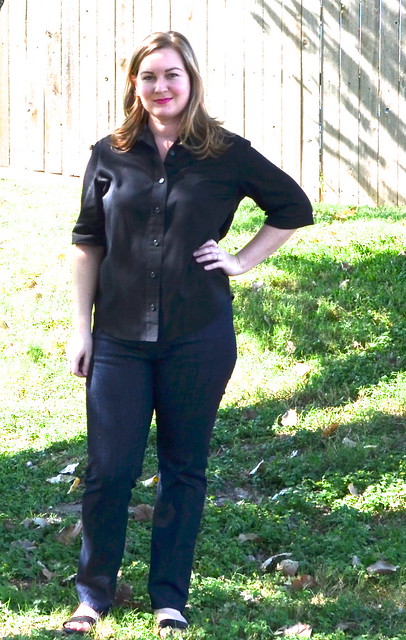
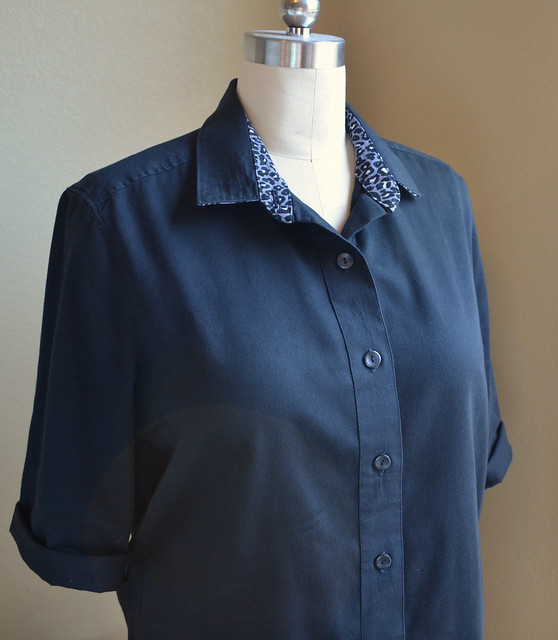
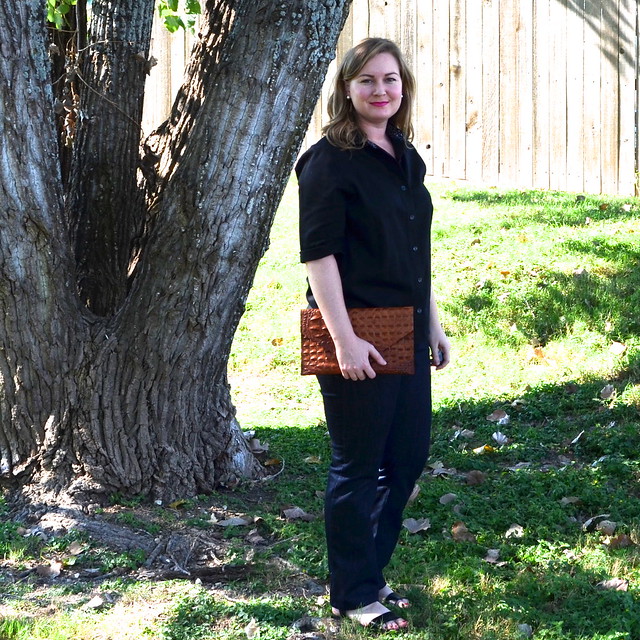
December is the perfect time to appreciate a long sleeve button up shirt such as the Archer pattern by Grainline Studios.  The weather suddenly turned cold (like, seriously, overnight freezing) in Texas, and I was in a hurry to make something long sleeved to wear to work.  The Archer button up shirt fit the bill perfectly.  I made it up in black cotton sateen.  This was my first time working with cotton sateen, and I am in love!  What a beautiful fabric.  The slight sheen makes it a touch fancier than plain cotton.
DSC_0023

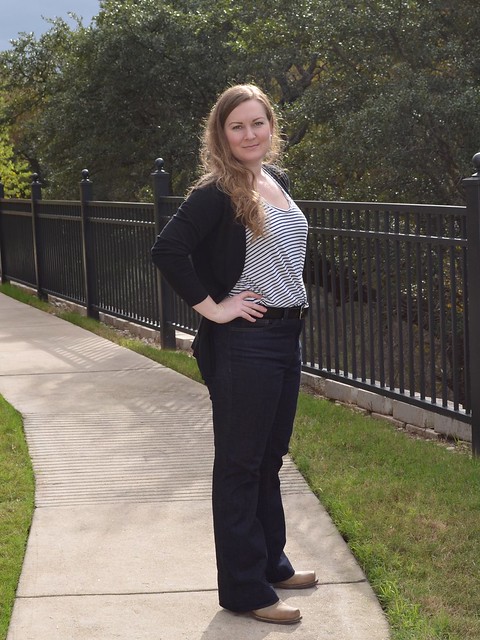
Please overlook the wrinkles–this shirt has been working hard.

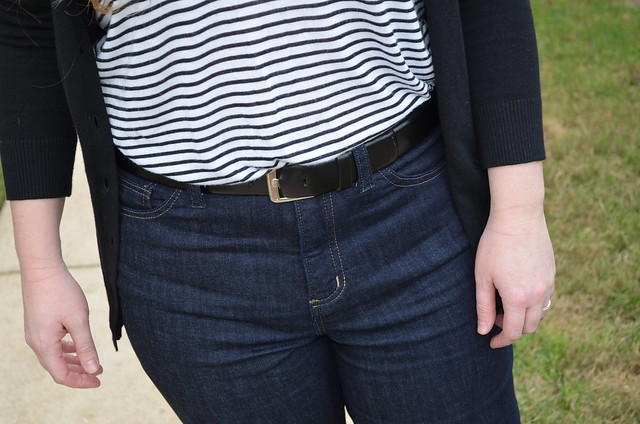
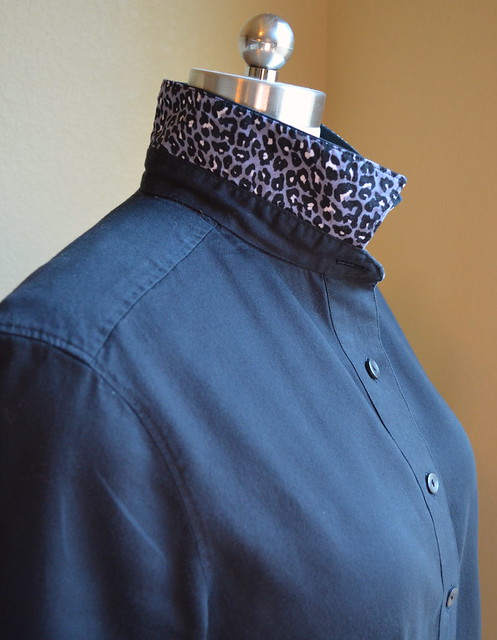
This is my fourth black work shirt.  I’ve been using different patterns and buttons to add variety to an otherwise drab work attire.

DSC_0025

Here we have red ladybug buttons.

DSC_0026

I was quite pleased with my top stitching on this particular shirt; while not perfect, it’s one of my best looking shirts so far.

I didn’t want to write separate posts on my other black shirts, so I will just show them briefly here to record their existence in 2013.

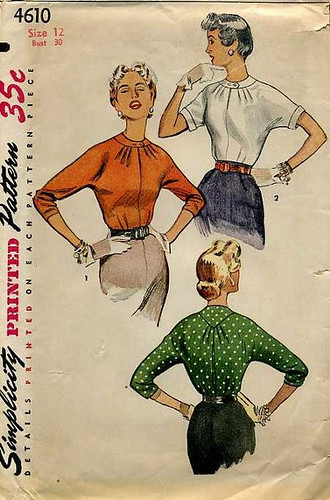
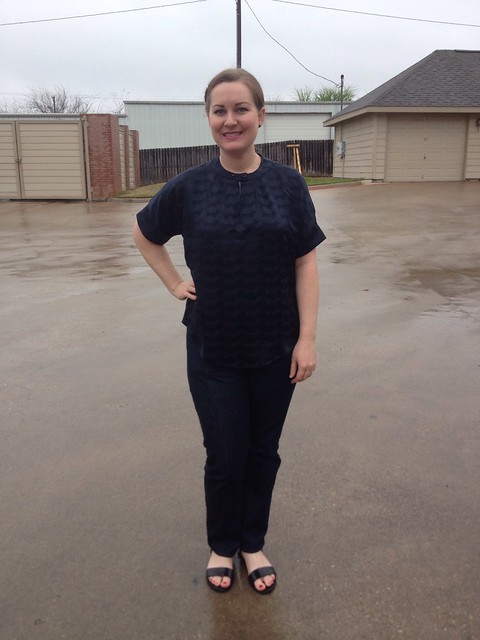
I made Gertie’s blouse pattern from her book:
DSC_0039

Complete with novelty buttons down the back:
DSC_0041

I never thought I’d find a use for cute novelty buttons, but black work shirts are a great back drop for fun buttons (It helps that I work at a fabric store where these buttons are totally appreciated!)
DSC_0036

I made my second slouchy blouse from Burdaystyle in a light suiting fabric:
DSC_0029

This one has kitty cat buttons (which didn’t photograph so well–my fault).

DSC_0032

And the first of my black shirts will go undocumented–the buttons are unremarkable as is the design.

So without further ado, here is my second Archer:
DSC_0012

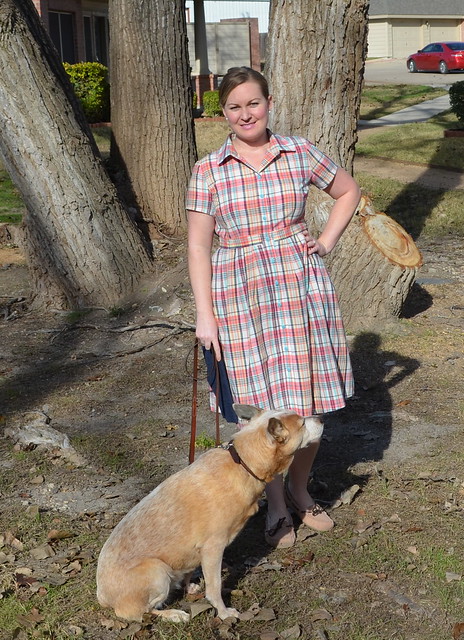
This one is made of a soft and cuddly flannel, finished just in time for the second cold spell this winter.

DSC_0010

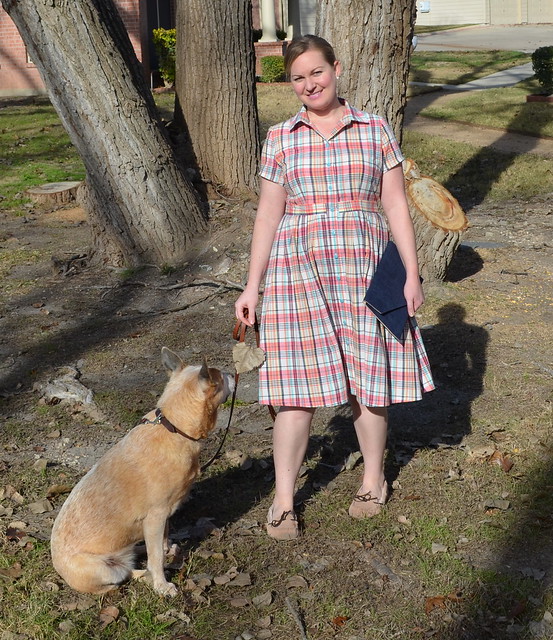
The plaid matching went fairly well.  For both my shirts, I left the buttonhole band attached (cut as one piece) to the right front, and I folded the band to the outside of the shirt (the right and wrong sides of both fabrics are indistinguishable from one another).  This method made matching the plaid across the button bands a breeze since I had one less piece to worry about.

DSC_0009

I attempted to match the back yoke as well, but of course the pleat throws the pattern off, so maybe I should have cut the yoke on the bias instead?  I’m undecided.  Any thoughts??  The collar matched up nicely at least, so there is a continuous line down the center back.
DSC_0017

I was disappointed that the topstitching did not go as smoothly on my second shirt.  The biggest problem was that I couldn’t get the tension on my stitches balanced correctly, so the bobbin side looked very sloppy.  I adjusted the tension to no avail, so I think I might need to take my machine in for a servicing.  It’s probably over due…

DSC_0015

On both my Archer shirts I added sleeve plackets for a dressier look (I like sewing plackets!)

The placket adds a little width to the sleeve, so I made my pleats deeper to gather in the extra width to fit the cuff.  The cuff is quite large on my wrists though, so I think I will resize the bottom of the sleeve and the cuff on future shirts for a better fit.

DSC_0021

Other than grading out to a larger size on the bottom half of the shirt, I did not make any fit adjustments to the pattern.  The shoulders are very slightly dropped on me but I decided not to change them at all.  The sleeves went in so smoothly (I didn’t even need to gather the sleeve head), and the overall look of the shirt is loose and casual anyway, so why mess with a good thing.

Sewing up two Archers was a pleasure, and I’m definitely appreciating the addition of two long sleeve shirts to my wardrobe.